
Introduction
Opening Hook Microscope :
Start with a witty question or statement to draw the reader in. For example: “Have you ever wondered how a simple instrument like a microscope can reveal the hidden world of tiny organisms and structures?” This question arouses curiosity about how such a tool can unlock mysteries on a microscopic level.
Importance of Microscopes:
Briefly describe the significance of microscopes in various fields, such as biology, medicine, and research. For example:
“From revealing the intricate structure of cells to enabling scientists to study bacteria, microscopes are fundamental in advancing our understanding of the natural world.” This sets the context for the blog and shows why it’s important to understand how microscopes work.
Purpose of the Post:
Clearly state that the post will focus on explaining how each part of the microscope works to enhance your ability to observe and study specimens. For example: “In this blog post, we will explore the major components of a microscope and how each plays an important role in providing you with clearer, more detailed observations.”
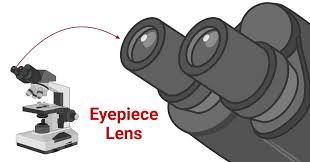
1. The Eyepiece (Ocular Lens)
- Description: The eyepiece is the part of the microscope that you look through to view the specimen. It is usually located at the top of the body tube. Typically, microscopes have eyepieces that magnify the image by 10x.
- Magnification of observation: The eyepiece serves as the starting point of magnification. It works with the objective lens to provide clear and detailed images. The higher the quality of the eyepiece, the better the overall viewing experience.
- Tips for users: “To get the best image, make sure your eyes are properly aligned with the eyepiece. Adjust the distance between your eyes and the lens for better focus and comfort.
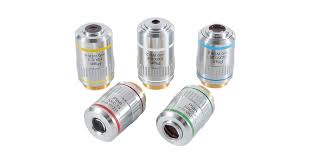
2. Objective Lenses
- Description:
Objective lenses are located near the specimen and vary in magnification strength. Common magnifications are 4x, 10x, 40x, and sometimes 100x (oil immersion lens). - Enhancement to Observation:
Each objective lens offers different levels of magnification, allowing you to switch between them for various levels of detail. The combination of the eyepiece and objective lenses helps to create a magnified image of the sample, depending on which lens is used. - Tip for Users:
“Start with the lowest magnification (4x or 10x) to locate your specimen, and then switch to a higher magnification (40x or 100x) for a detailed examination.”
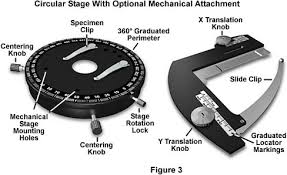
3. Stage
- Description:
The stage is the flat platform where the slide holding the specimen is placed. It often has clips or a mechanical system to move the slide around. - Enhancement to Observation:
A stable and level stage ensures that the specimen remains in place while observing it. Many microscopes have a mechanical stage, which allows for fine movement of the slide, improving precision when adjusting your view. - Tip for Users:
“Make sure the stage is clean and free from dust. Also, securely place the specimen slide using stage clips to avoid movement while you adjust magnification.”
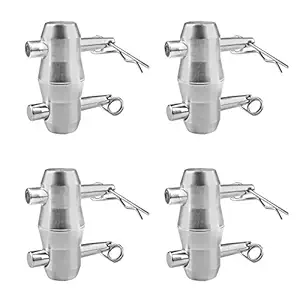
4. Stage Clips
- Description: Stage clips hold the slide firmly on the stage. These clips are important for keeping the slide stable during observations.
- Enhancing Observation: Stage clips prevent the slide from moving while using high magnification, thus maintaining focus on the specimen. This is essential for obtaining sharp and clear images, especially at high magnification levels.
- Tips for Users: “Always check that the slide is properly positioned and secured before you start observing, to avoid accidentally disturbing the focus.”
5. Condenser and Diaphragm
- Description: The condenser focuses light on the specimen, while the diaphragm controls how much light passes through. The condenser adjusts the light intensity depending on the transparency of the specimen.
- Enhancement of observation: The condenser helps improve the contrast and detail of the image. The diaphragm corrects the light intensity, which can be adjusted for the best possible clarity. The right amount of light enhances the resolution of the specimen.
- Tips for users: “Adjust the diaphragm to control the light intensity for better contrast. A good balance of light will prevent the image from being too bright or too dark.
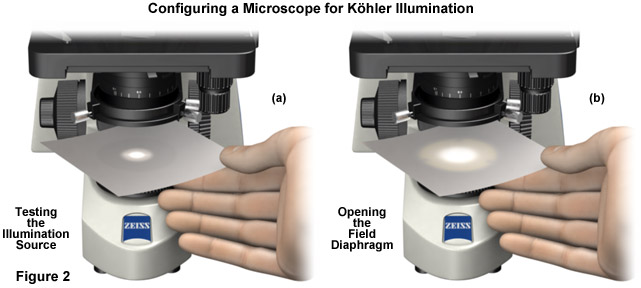
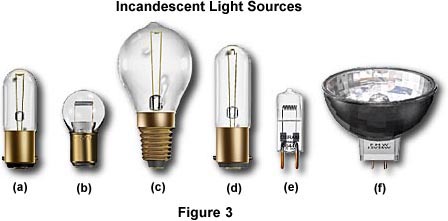
6. Illumination (Light Source)
- Description: The light source, usually built into the base of the microscope, provides the illumination needed to view the specimen. It can be either LED or halogen lighting. Some microscopes offer adjustable light intensity.
- Enhancing Observation: Bright and evenly distributed light is important for providing clear and detailed images. Without adequate lighting, details in your specimen will be obscured. Lighting helps highlight key features of the specimen, making it easier to identify and study.
- Tips for Users: “Adjust the brightness based on the transparency of the specimen. Some specimens require more light, while others may require less for optimal viewing.
7. Coarse and Fine Focus Knobs
- Description: These knobs are used to adjust the sharpness of the image. Coarse focus is used for larger adjustments (when first locating the specimen) while fine focus is used for smaller, precise adjustments to obtain sharp, detailed images.
- Enhancing Observation: The focus knobs allow you to fine-tune the image at different magnification levels. Coarse focus helps bring the image into coarse focus quickly, and fine focus helps sharpen the image for detailed examination.
- Tips for Users: “Start with coarse focus to locate your specimen, then switch to fine focus to obtain the sharpest, most detailed view.”

8. Arm and Base
- Description: The arm is the part of the microscope that supports the body, while the base provides stability. Together, they ensure that the microscope remains stable during use.
- Enhance Observation: A stable arm and base reduce vibrations that can interfere with your observation. A stable microscope helps maintain your visual acuity, especially when examining specimens at high magnification.
- Tips for Users: “When moving or setting up the microscope, always handle it by hand to prevent damaging any delicate parts. Make sure the microscope is placed on a sturdy surface to maintain stability.
Conclusion
- Summary: Recap how each part of the microscope works together to improve the quality and clarity of observations. Emphasize the importance of understanding the role of each part for successful use.
- Final Thought: “By mastering the components of the microscope, you can explore the hidden world of the microscopic universe with precision and clarity.”
- Call to Action: Encourage readers to apply what they learned to real-life microscope use. For example: “The next time you pick up a microscope, remember that each component plays a role in bringing your specimen into focus. Whether you’re in the lab or the classroom, these tips will help you get the most out of your microscope experience.”
Kindly visit our homepage…………..